

For years there's been a never-ending debate in the development industry on which is the best map provider, let's see who wins the Game of Map Providers.
A long time Google Maps SDK remained king due to it's reliability but this started to shift as the price point was way higher than competitors and didn't come with the same level of customizability such as Mapbox or the free Leaflet.
When you decide on a mapping service you have to consider multiple factors:
- price point ($/map load or API request)
- reliability (how accurate and robust the service is)
- customizability (the level of personalisation available, color palette or markers)
- developer experience (how easy to integrate and develop in an application)
- other services such as Search (also known as Geocoding), Navigation and others
1. Why Mapbox?
Earlier this year I developed a full stack application to increase bicycle theft awareness using Mapbox and React and loved how easy to use and customize it is. Check it out over at bike-theft-map.bikmo.com.
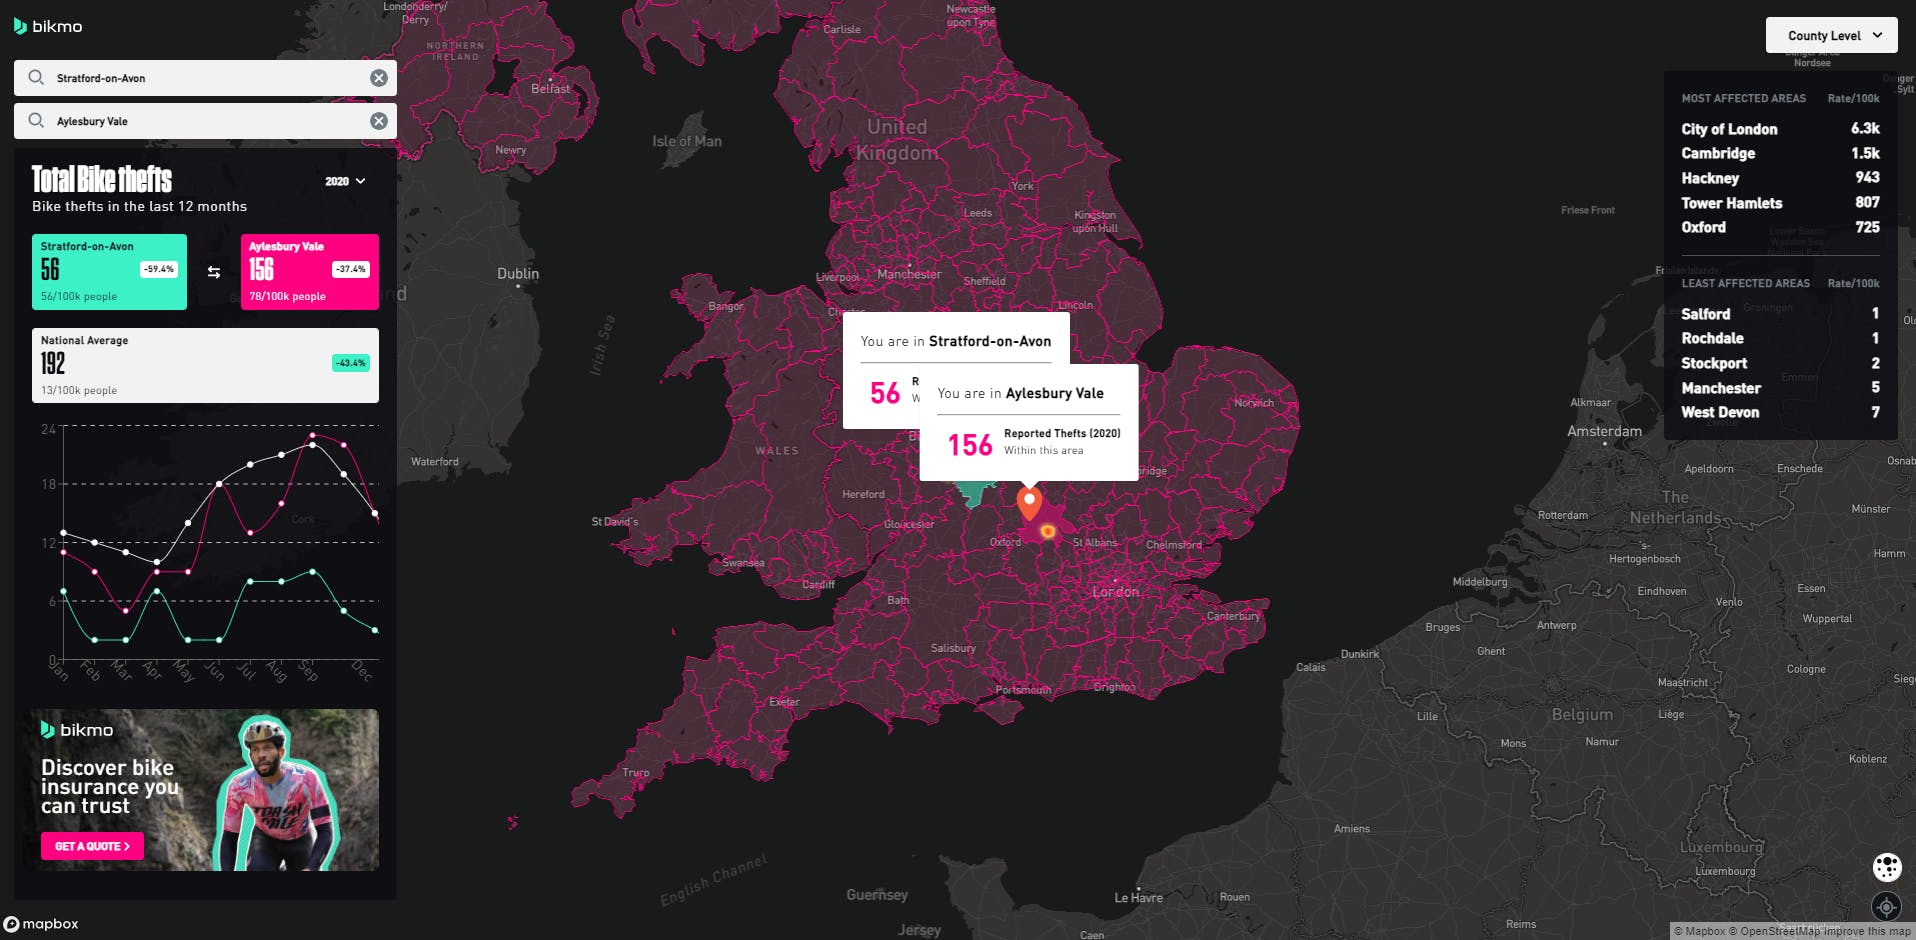
In a sea of apps that use mostly Google Maps you can easily standout by taking advantage of the numerous customizable features of Mapbox through it's entire slate of services.
Using Mapbox Studio you can create the dark mode map of your dreams and even integrate the color palette of a certain branding up to the leaf color in trees (kinda).
Even more, the free plan allows for up to 100k/month map loads which is extremely good for development and even small sized applications.
2. What are we building?
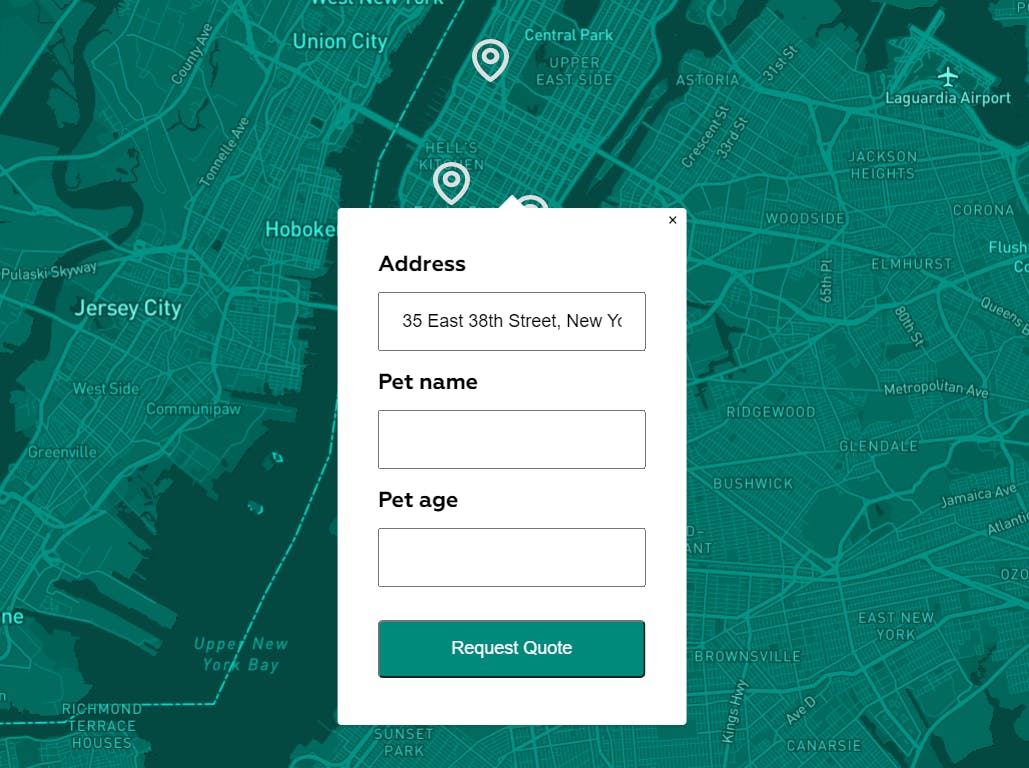
We'll make a NextJS app for a Pet Veterinary with multiple clinics in New York, using it people can view markers for each location on the map and by clicking on it can complete a form regarding their pet details before taking it there.
3. Creating a custom Map Style
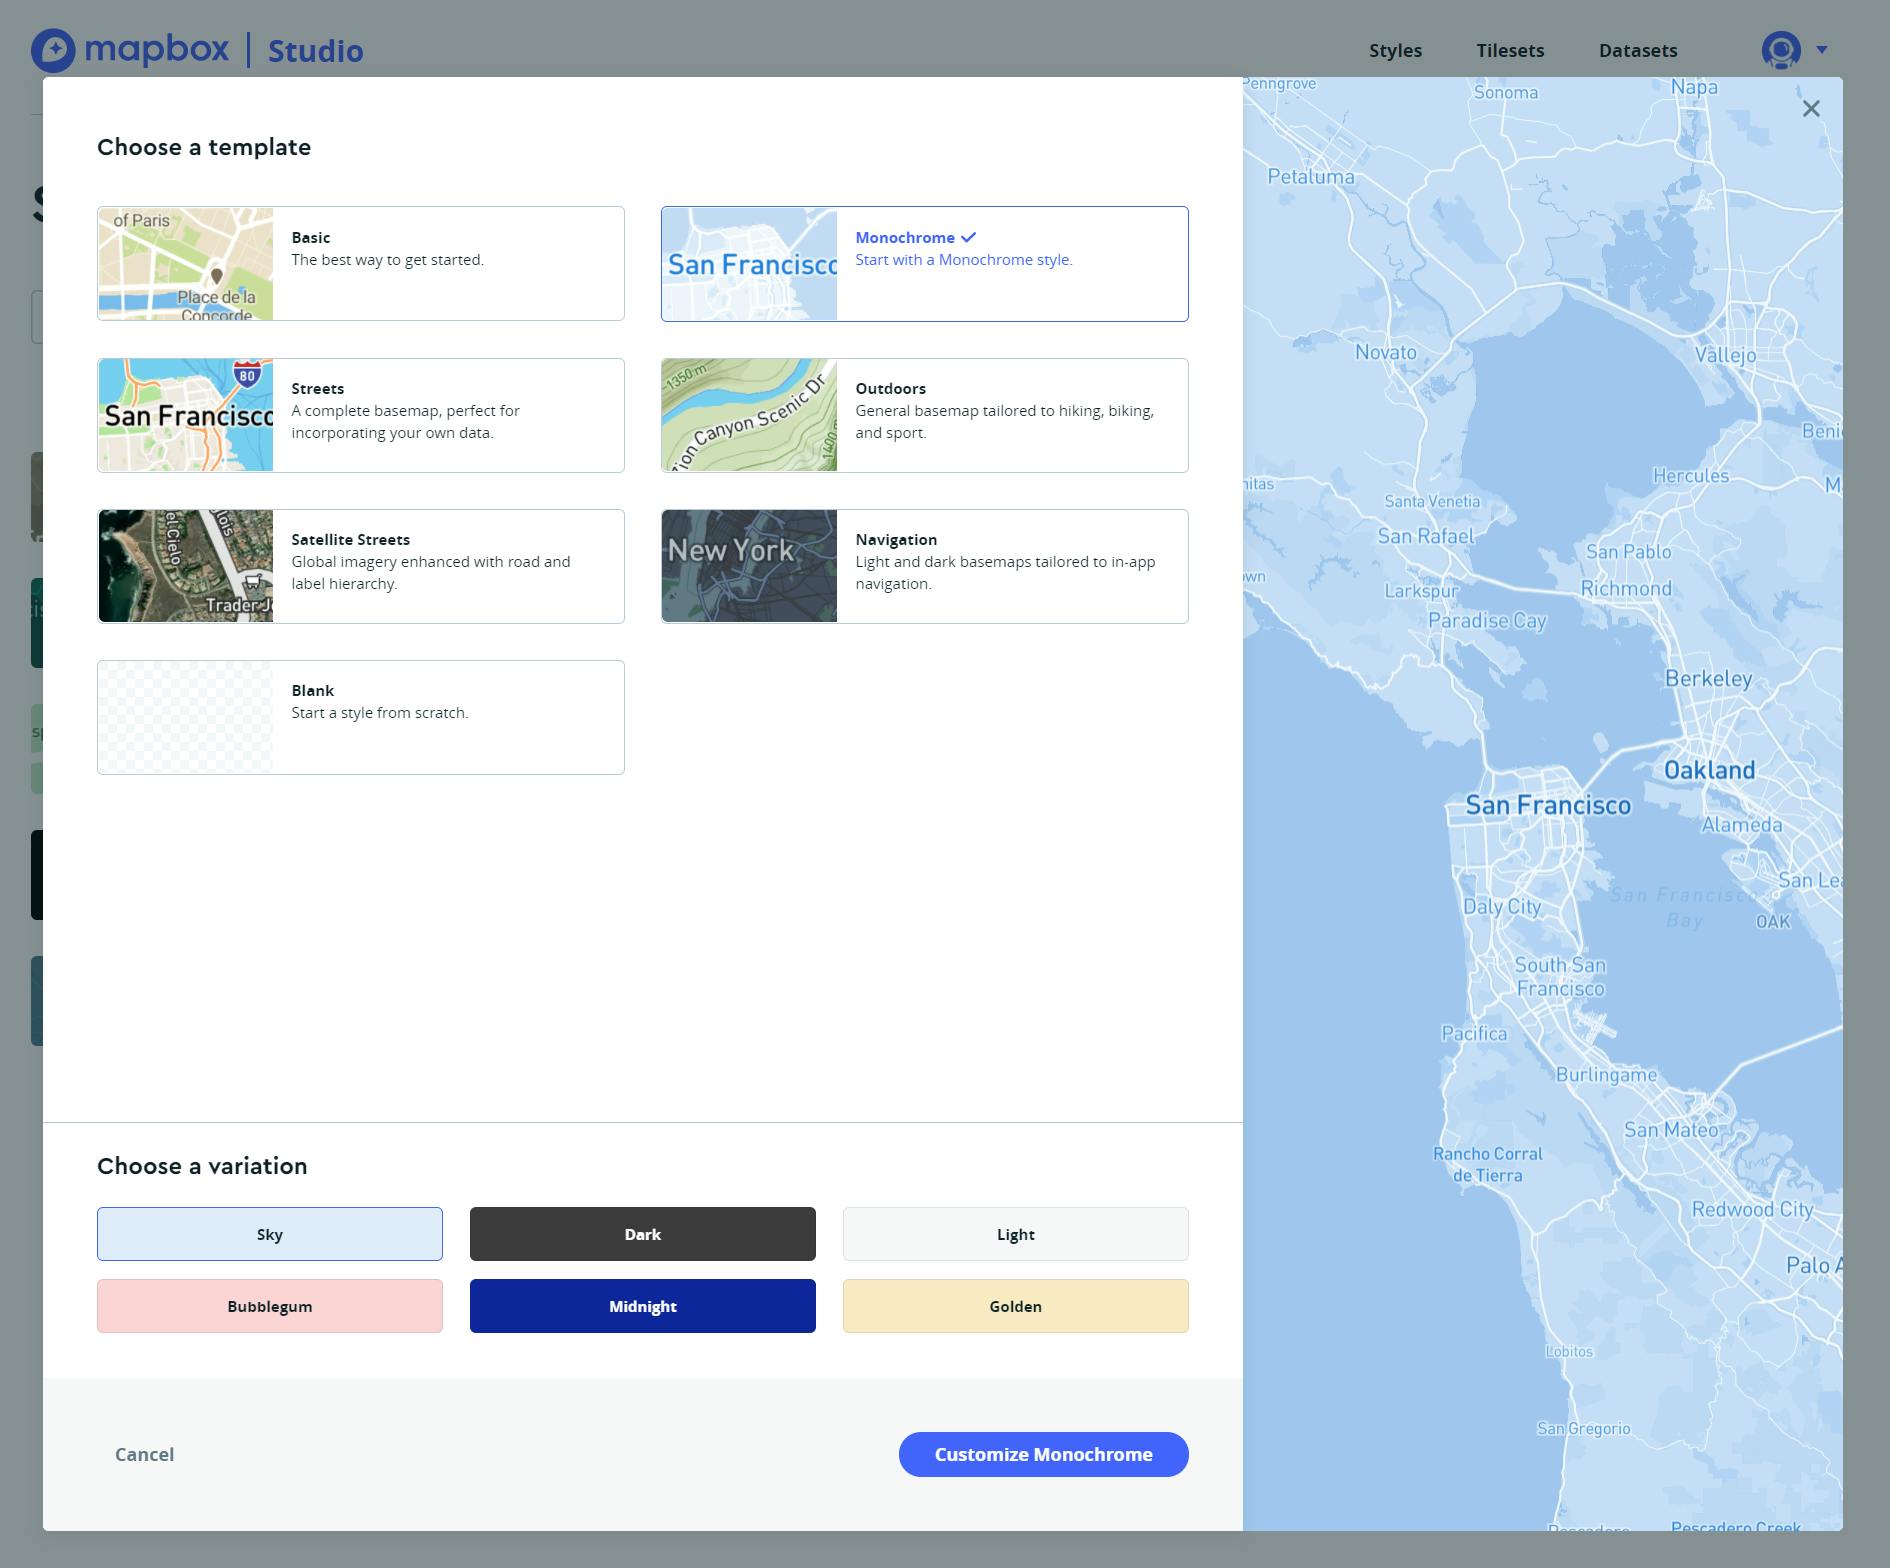
After we create an account we can visit Mapbox Studio and create a new style by pressing the New style button.
Choose a base style which we can then customize with our Pet Vet Clinic branding colors.
Let's select the Monochrome style as it takes the least time to customize.
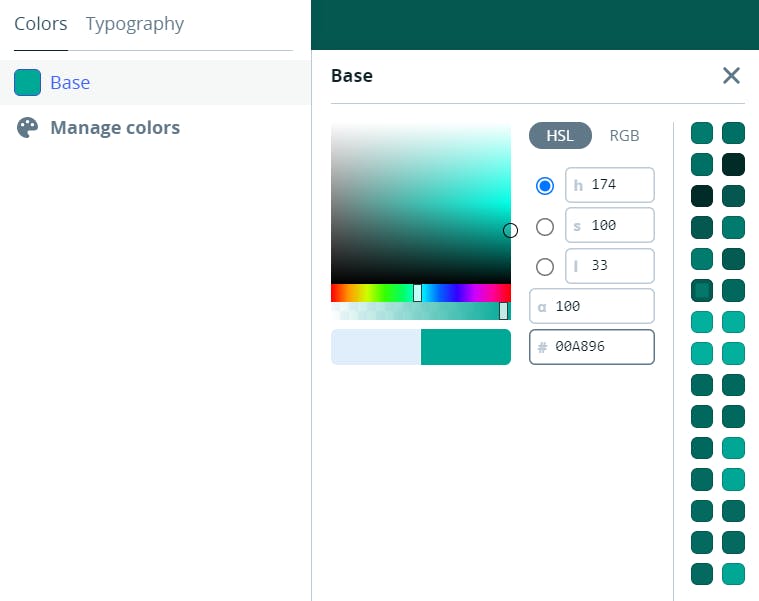
In the left sidebar menu under colors we can customize the color (#00A896).
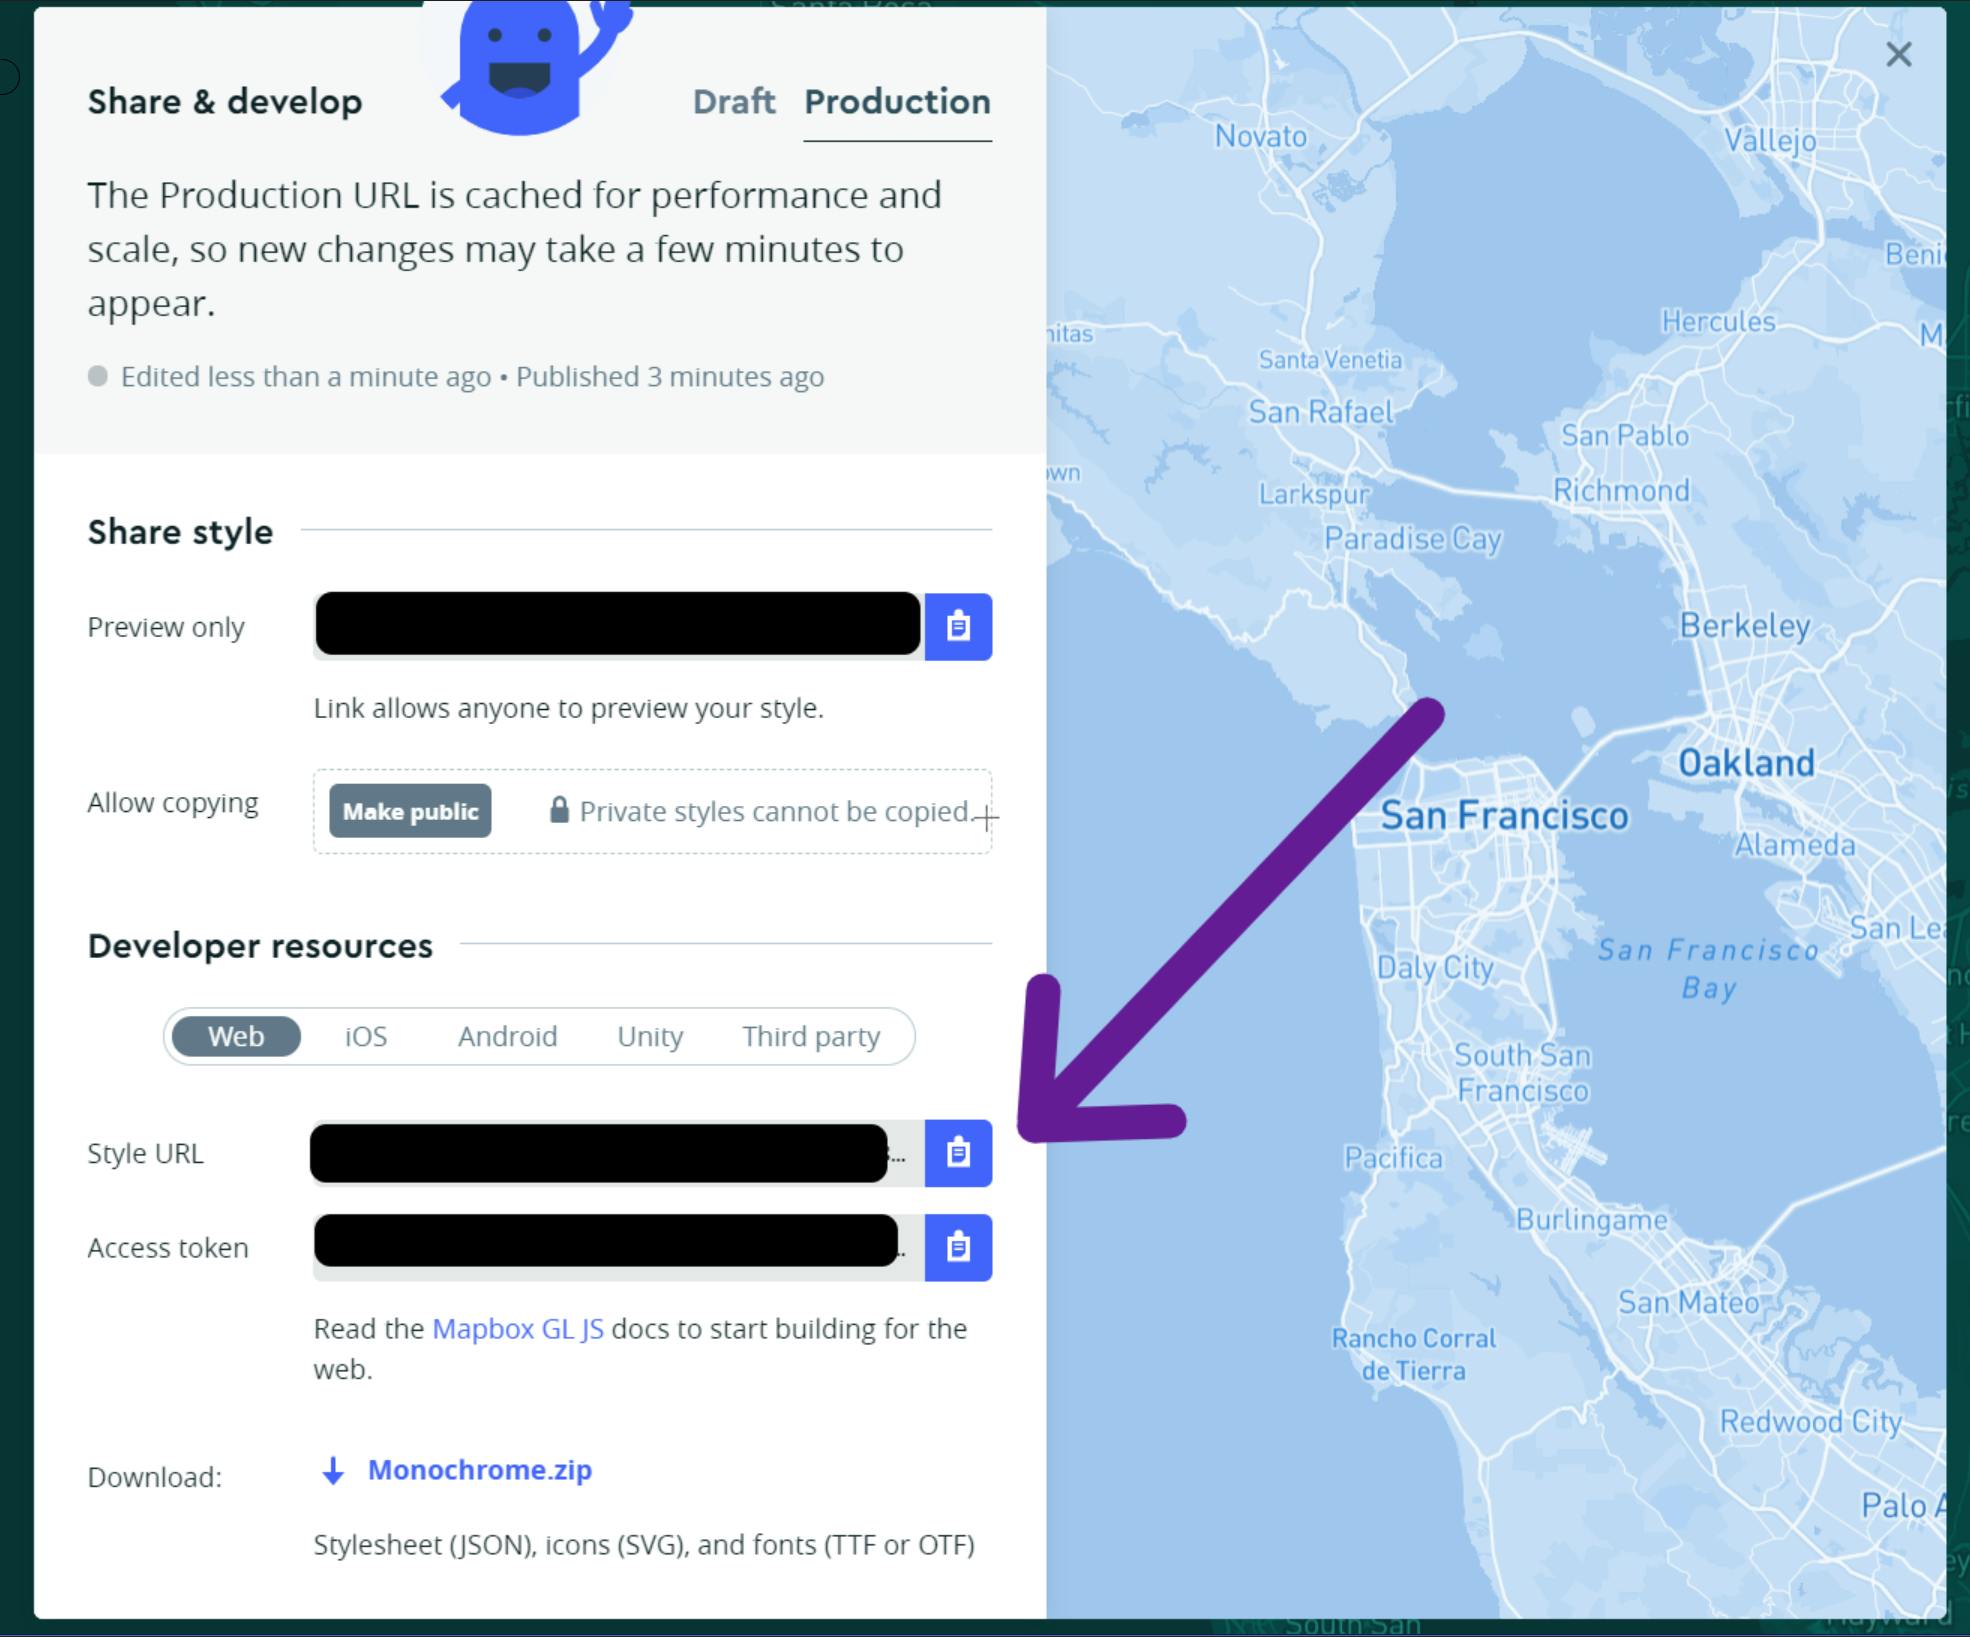
In order to publish the changes we have to press the tiny Publish button in the top right corner. Now all we need is the style url to use in our website which we can find in the upper right corner.
4. Mapbox in React
Since we are building this App in NextJS we can either use the official Vanilla JS Mapbox GL JS library or the great React Wrapper react-map-gl. I'll use the latter as it works great in our use case.
Let's create a brand new NextJS project and install the dependencies:
npx create-next-app
npm install react-map-gl
npm install --dev postcss autoprefixer tailwindcss
Let's first extend the map related components from react-map-gl and create some custom ones in the components/ folder.
In components/pin/index.js we add the custom map pin icon within the marker:
import React from "react";

const ICON = `M12 5.7931C10.8649 5.7931 9.75531 6.10455 8.81151 6.68806C7.86771 7.27156 7.13212 8.10093 6.69774 9.07126C6.26335 10.0416 6.1497 11.1093 6.37115 12.1394C6.59259 13.1695 7.13919 14.1158 7.94182 14.8584C8.74445 15.6011 9.76707 16.1068 10.8804 16.3118C11.9936 16.5167 13.1476 16.4115 14.1963 16.0096C15.245 15.6076 16.1413 14.927 16.7719 14.0537C17.4025 13.1804 17.7391 12.1537 17.7391 11.1034C17.7374 9.69554 17.1322 8.34577 16.0563 7.35023C14.9803 6.35469 13.5216 5.7947 12 5.7931ZM12 13.5172C11.484 13.5172 10.9797 13.3757 10.5507 13.1104C10.1217 12.8452 9.78732 12.4682 9.58988 12.0272C9.39243 11.5861 9.34077 11.1008 9.44143 10.6325C9.54209 10.1643 9.79054 9.73421 10.1554 9.39664C10.5202 9.05906 10.985 8.82917 11.4911 8.73603C11.9971 8.64289 12.5216 8.6907 12.9983 8.87339C13.475 9.05608 13.8824 9.36547 14.1691 9.76241C14.4557 10.1594 14.6087 10.626 14.6087 11.1034C14.6079 11.7434 14.3328 12.357 13.8438 12.8095C13.3547 13.262 12.6916 13.5165 12 13.5172ZM12 0C8.8185 0.00332214 5.76834 1.17421 3.51868 3.25579C1.26903 5.33737 0.00359039 8.15965 0 11.1034C0 20.4398 10.649 27.4446 11.1023 27.7382C11.3655 27.9086 11.6788 28 12 28C12.3212 28 12.6345 27.9086 12.8977 27.7382C14.9139 26.3644 16.7588 24.7875 18.3985 23.0365C22.063 19.1371 24 15.0108 24 11.1034C23.9964 8.15965 22.731 5.33737 20.4813 3.25579C18.2317 1.17421 15.1815 0.00332214 12 0ZM16.0829 21.0862C14.8392 22.4078 13.4731 23.6262 12 24.7276C10.5269 23.6262 9.16077 22.4078 7.91713 21.0862C5.73339 18.7511 3.13043 15.1236 3.13043 11.1034C3.13043 8.92684 4.0649 6.83939 5.72827 5.30029C7.39164 3.7612 9.64764 2.89655 12 2.89655C14.3524 2.89655 16.6084 3.7612 18.2717 5.30029C19.9351 6.83939 20.8696 8.92684 20.8696 11.1034C20.8696 15.1236 18.2666 18.7511 16.0829 21.0862Z`;

const pinStyle = {
  fill: "#dfdfdf",
  stroke: "none"
};

function Pin(props) {
  const { size = 20 } = props;

  return (
    <svg height={size} viewBox="0 0 24 28" style={pinStyle}>
      <path d={ICON} />
    </svg>
  );
}

export default React.memo(Pin);
In components/marker/index.js we extend the marker component:
import Pin from "../pin";
import { Marker as MapMarker } from "react-map-gl";

const Marker = (props) => {
  const { latitude, longitude, onClick } = props;
  return (
    <MapMarker longitude={longitude} latitude={latitude}>
      <div onClick={onClick} style={{ cursor: "pointer" }}>
        <Pin size={32} />
      </div>
    </MapMarker>
  );
};

export default Marker;
And finally in components/popup/index.js for the form popup
import { useState } from "react";
import { Popup as MapPopup } from "react-map-gl";

const Popup = (props) => {
  const { latitude, longitude, children, closePopup } = props;
  return (
    <MapPopup
      latitude={latitude}
      longitude={longitude}
      closeOnClick={false}
      onClose={closePopup}
      anchor="bottom"
      closeButton
    >
      {children}
    </MapPopup>
  );
};

export default Popup;
Now we can proceed by adding the map and business logic for showing markers and popups. This will include the minimal styling and the map viewport state so it can be easily updated to use an API for markers or form submission.
import { useEffect, useState } from "react";
import ReactMapGL from "react-map-gl";
import Marker from "../components/marker";
import Popup from "../components/popup";

const defaultMarkers = [
  {
    latitude: 40.756352,
    longitude: -74
  },
  {
    latitude: 40.78,
    longitude: -73.99
  },
  {
    latitude: 40.75,
    longitude: -73.98
  }
];

const mapboxApiAccessToken = "your mapboxApiAccessToken";
const mapStyle = "your mapStyle";

const Index = () => {
  // initial map coordinates and zoom
  const [viewport, setViewport] = useState({
    latitude: 40.7563511545941,
    longitude: -73.98063651971727,
    zoom: 11
  });
  const [markers, setMarkers] = useState([]);
  const [formData, setFormData] = useState({});
  const [popup, setPopup] = useState(null);

  useEffect(() => {
    // here we could make a request to fetch markers from our API
    // but i'll just init with some sample values
    setMarkers(defaultMarkers);
  }, []);

  // handler for updating viewport on panning (moving the map) or other map events
  const handleChangeViewport = (viewport) => {
    setViewport(viewport);
  };

  const handleClickMarker = ({ latitude, longitude }) => {
    var requestOptions = {
      method: "GET",
      redirect: "follow"
    };
    // we can use the Mapbox Reverse Geocoding to convert coordinates to address
    // see more info here https://docs.mapbox.com/api/search/geocoding/
    fetch(
      `https://api.mapbox.com/geocoding/v5/mapbox.places/${longitude},${latitude}.json?access_token=${mapboxApiAccessToken}`,
      requestOptions
    )
      .then((response) => response.json())
      .then((result) => {
        const popup = {
          latitude,
          longitude,
          address: result.features[0].place_name
        };
        setPopup(popup);
        setFormData({ address: popup.address });
      });
  };

  const handleRequestQuote = (event) => {
    event.preventDefault();
    // do something with form values, maybe POST to API
    console.log(formData);
  };

  const handleChange = (event) => {
    // trick to correlate between input name and state object key - value
    setFormData({ ...formData, [event.target.name]: event.target.value });
  };

  return (
    // setup map to cover full screen
    <div style={{ width: "100vw", height: "100vh" }}>
      <ReactMapGL
        {...viewport}
        mapStyle={mapStyle}
        mapboxApiAccessToken={mapboxApiAccessToken}
        width="100%"
        height="100%"
        onViewportChange={handleChangeViewport}
      >
        {markers.map((marker, index) => (
          <Marker
            key={index}
            latitude={marker.latitude}
            longitude={marker.longitude}
            onClick={() => handleClickMarker(marker)}
          />
        ))}
        {popup && (
          <Popup
            latitude={popup.latitude}
            longitude={popup.longitude}
            closePopup={() => setPopup(null)}
          >
            <div>
              <form
                onSubmit={handleRequestQuote}
                style={{
                  display: "flex",
                  flexDirection: "column",
                  padding: "20px",
                  gap: "12px",
                  fontWeight: "600",
                  fontFamily: "Geometria"
                }}
              >
                <label htmlFor="address">Address</label>
                <input
                  type="text"
                  name="address"
                  value={popup.address}
                  onChange={handleChange}
                  style={{ padding: "12px 16px" }}
                  readOnly
                />
                <label htmlFor="name">Pet name</label>
                <input
                  type="text"
                  name="name"
                  onChange={handleChange}
                  style={{ padding: "12px 16px" }}
                />
                <label htmlFor="age">Pet age</label>
                <input
                  type="text"
                  name="age"
                  onChange={handleChange}
                  style={{ padding: "12px 16px" }}
                />
                <button
                  type="submit"
                  style={{
                    marginTop: "12px",
                    padding: "12px 16px",
                    backgroundColor: "#008a7c",
                    color: "white",
                    borderRadius: "4px"
                  }}
                >
                  Request Quote
                </button>
              </form>
            </div>
          </Popup>
        )}
      </ReactMapGL>
    </div>
  );
};

export default Index;
And that's all we need to develop a map based React application with MapBox, there's many more thing that can be done using this amazing tool like heatmaps, map transitions, GeoJSON animation and others.
If you want to check this demo project (replace mapboxApiAccessToken & mapStyle in index.js) here is the CodeSandbox.
Check the official website examples or check this great Mapbox based tool to increase bicycle theft awareness.
I hope you enjoyed this short tutorial on integrating map services with Mapbox and NextJS and would love if you give it a 🦄!